Every spring I do a lot of teaching around recycling and taking care of our environment. The warm weather and blooming flowers set a perfect backdrop for talking about keeping our community clean, garbage free and how to Reduce, Reuse and Recycle. As we learn about all the ways we can recycle we tend to collect a lot of "stuff" or "junk" that we try to re-use or re-purpose. One of the ways we use our found objects is to create collages and art sculptures.
Louise Nevelson is one of my favorite sculptors to share with my students. She was an artist most known for her monochromatic abstract expressionist sculptures. Her most famous sculptures were created with materials such as wood, paper, aluminum and other pieces of found objects from the streets of New York and she would assemble the pieces in open-faced wooden boxes that were stacked and grouped to make free-standing walls and displays. Her sculptures were painted in a single color, usually black, but sometimes white or gold.
To create our sculptures we need to have the following supplies:
- a base (picture frame, or shoe box, shoe box lid, or piece of wood or cardboard)
- found objects (anything from the recycling bin, including toilet rolls, nuts, bolts, clothespins, etc.)
- glue (wood glue, Elmers glue, hot glue gun, cool glue gun)
- spray paint
To start my lessons I like to share photographs of Louise Nevelson's sculptures and have my students study each piece pointing out the different items in each box and try to figure out what each piece used to be. We talk a lot about what shapes and lines we see (circle, oval, rectangle, curved, straight, etc..) as well as what the concept of abstract means, and also about how different pieces can be layered or placed on top of each other to create designs.
Next I hand out the bases for our sculptures. In the past I have used shoe boxes, shoe box lids and picture frames. I love the look of shoe boxes because they remind me of Louise Nevelson's sculptures the most but I find picture frames work the best with my students because when we dismantle our display and send home our art work, parents tend to toss the shoe boxes but keep the art in the picture frame.
So once we have our base I have the students experiment with some of the found and collected materials and see what they can create by layering and using many different shapes. We walk around and share our different creations. I make sure to point out where I see layering, use of different shapes and lines, interesting use of space and use of empty space (this is hard for some). I find this step is very important and is a must before I bring out the glue, otherwise I end up with a lot of flat pieces as they focus on filling up the space instead of layering and creating an interesting collection.
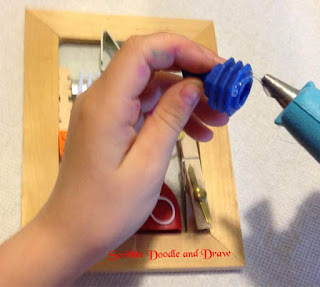
After sharing, the students go back and try to add to their sculptures, and then I bring out the glue. So for most items white glue or wood glue works just fine but with heavier items they need to be hot glued in order to stay. I usually set up a cool glue gun at each table group and the students share the glue as they need to. With younger students you might want to have them design the sculpture first and then the teacher or older helper could do the hot glue step.
Once the sculptures are glued and dried, we take them outside and spray paint them. I like to use a cardboard box in case I get crazy with the spray paint.
This post is part of the Exploring Famous Artists Blog series hosted by Messy Little Monster.


This is SO cool! I love it!
ReplyDelete