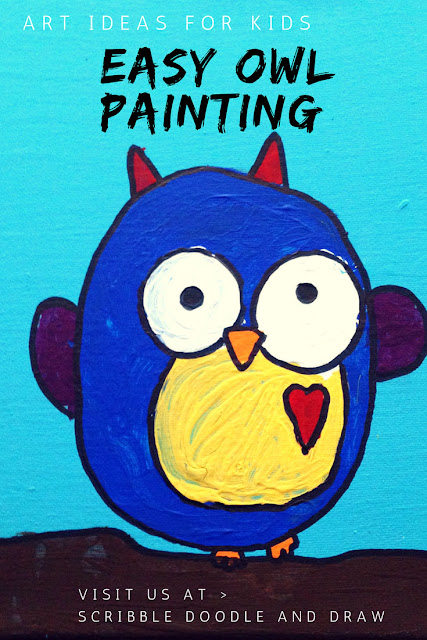
This year my daughter insisted on having an owl themed birthday party. She also wanted to create an owl painting project on canvas that she could hang up on her wall. So we came up with this art idea.
Since her birthday party, I have since painted the same owls with my grade 1 art class on paper instead of canvas. We have been learning about the element of shape in art class and how we can use shapes to create our compositions.
Materials needed:
- 5x7 Canvas or thicker piece of paper (80lbs or more)
- pencil
- Acryclic paint ( we used: brown, light blue, dark blue, yellow, white, pink, purple, orange) or Tempra paint will work just fine if you are painting on paper.
- Paint brushes
- Water (to clean brushes)
- Black sharpie marker
How to make an owl painting with kids:
Step 1: We covered the entire canvas with blue paint and let it dry. For the birthday party we had this done the before the party started. Similarly if I was going to teach this art lesson to my students I would have complete the background at the end of a previous lesson, or use colored paper.
Step 2: With pencils I show the kids how to draw the owl. I like to use a directed drawing technique, which means I draw a part (the kids watch) and then they draw what I just drew and then repeat. I always talk about what shapes and lines I am using as they try to replicate my drawing.
- First we draw a “fat” oval by using a tracer. I chose to use a tracer so that the owl would take up most of the canvas, especially since we wanted to paint it.
- Then we drew the feet.
- Then we draw a branch. (a not so straight line)
- Then we draw 2 large circles for the eyes
- A triangle nose and triangle ears.
- A half an oval for the stomach .
- Two wings.
- And a heart.
- (optional) Have the kids trace their pencil lines with a sharpie. You can do this now or what until after painting.
Step 3: Then we paint. I have the kids start painting the eyes first. I love a nice crisp white eye! And then continue to paint the rest of their owl. We then we let it dry completely.
Step 4: When it is dry, we color in the black part of the eye and then I have the kids outline their owls with black sharpies to get a nice clean edge.
And that’s it! Ready for hanging!
Want more kids art right in your inbox?
And get weekly updates, with art ideas for your home or classroom!
Keep on Creating!


To turn Sunday into Super Sunday, I try to find an activity that my whole family has to work with me. After reading your blog and discussing it at https://www.discussionforum.net/ I think I have got the activity to make this Sunday better.
ReplyDelete