Google+
Showing posts with label art lesson. Show all posts

Green Wilma Frog in Space storybook art idea


Learning about outer space is always a hot topic for kids of all ages.  There are many great story books available, including the story “Green Wilma Frog in Space” by Ted Arnold.   In this story Wilma goes on an adventure when she is mistaken for an alien child, and goes for a ride in a spaceship.   Wilma’s humorous adventure will have any child smiling in delight.

Green Wilma Frog in space book

Today I wanted to share a fun and simple drawing lesson that can be completed after reading Green Wilma Frog in Space.  After reading the story, show the kids how to draw a spaceship and draw Wilma looking through the window.  It’s a great way to re-visit the story and review Wilma’s adventure.


how to draw a spaceship drawing lesson

Materials needed:

  • Paper 
  • Pencil and/or black sharpie 
  • Pencil crayons or markers
Storybook craft learn how to draw a spaceship

How to draw a spaceship:

  • First have the kids draw a large curved line and then draw a second curved line underneath it, creating an eye shape.  This is the body of the space ship. 
  • Next have them draw a curved line in the middle of the spaceship, separating it into two parts and then draw in some circles for windows. 
  • Then have the kids draw a half oval (or hill) on the top of the ship and then draw a second half oval inside the first.  Then we add two more half ovals for eyes and include a mouth.  And there you have it Wilma is complete! 
  • Next have them draw curved lines for the feet of the spaceship (or landing gear as you will) and add another small half oval for the bottom of the feet. 
  • Then have them draw a half of a square for the bottom of the spaceship (engine thrusters). 
  • Next have the kids decorate the spaceship by drawing more buttons and bolts by adding more shapes and lines to the ship.
  • Lastly add color to your spaceship.

Step by step instructions on how to draw a spaceship for kids
Once the spaceship is drawn and colored you can add one more step and cut out the ship and then have your kids complete a re-telling of the story using their spaceship as a prop.  Now you could keep it as a cut-out or glue the spaceship onto a Popsicle stick so it is more like a puppet.  Encourage kids to be as animated as they can while re-telling.  Adding lots of bops and beeps and va-rooms always helps! 

Re-telling stories is a great way to practice recognizing what is important in the story without telling too much. Retelling also helps readers recall what is happening in the story, develop a sense of story structure, and become more accurate in monitoring their understanding.

art activity based on story book Green Wilma Frog in space


Want more kids art right in your inbox?


And get weekly updates, with art ideas for your home or classroom!

Keep on Creating!


Easy Owl painting project for kids


This year my daughter insisted on having an owl themed birthday party.  She also wanted to create an owl painting project on canvas that she could hang up on her wall.  So we came up with this art idea.

Easy owl painting project for kids


Since her birthday party, I have since painted the same owls with my grade 1 art class on paper instead of canvas.  We have been learning about the element of shape in art class and how we can use shapes to create our compositions.


Materials needed:


How to make an owl painting with kids:


Step 1: We covered the entire canvas with blue paint and let it dry.  For the birthday party we had this done the before the party started.  Similarly if I was going to teach this art lesson to my students I would have complete the background at the end of a previous lesson, or use colored paper.


Step 2: With pencils I show the kids how to draw the owl.  I like to use a directed drawing technique, which means I draw a part (the kids watch) and then they draw what I just drew and then repeat.  I always talk about what shapes and lines I am using as they try to replicate my drawing.   

  • First we draw a “fat” oval by using a tracer.  I chose to use a tracer so that the owl would take up most of the canvas, especially since we wanted to paint it.    
  • Then we drew the feet. 
  • Then we draw a branch.   (a not so straight line)
  • Then we draw 2 large circles for the eyes
  • A triangle nose and triangle ears.   
  • A half an oval for the stomach .   
  • Two wings.   
  • And a heart.
  • (optional) Have the kids trace their pencil lines with a sharpie.  You can do this now or what until after painting.
How to draw an owl step by step for kids
Step 3: Then we paint.  I have the kids start painting the eyes first.  I love a nice crisp white eye!  And then continue to paint the rest of their owl.  We then we let it dry completely.


Step 4: When it is dry, we color in the black part of the eye and then I have the kids outline their owls with black sharpies to get a nice clean edge. 


Easy owl painting lesson for kids


And that’s it!  Ready for hanging! 


Want more kids art right in your inbox? 


And get weekly updates, with art ideas for your home or classroom! 

Keep on Creating! 


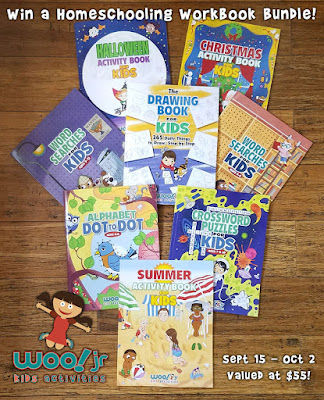
Kids Activity and Drawing Book Giveaway from Woo Jr

Today I wanted to let you know about a great opportunity that I have had recently to review a couple of fantastic kids drawing and activity books and invite you to enter to win 8 different titles in this series of books.  

Woo Jr drawing and activity books

A couple weeks ago, I was sent The Drawing Book For Kids-365 daily things to draw, step-by-step, which is full of easy diagrams that show kids how to draw everything from frogs, and butterflies to Vampires and Robots.   I was also sent The Halloween Activity Book for kids, and The Christmas Activity Book for kids.  These activity books are full of coloring pages, word searches, dot to dot pictures, and more.  My kids took one look at the books and were so excited to get into them.  My daughter even exclaimed "yeah, I want to do one page everyday until Christmas", and then preceded to finish 5 pages!


Woo Jr Christmas activity book for kids

My favorite of the three books that I received is definitely the The Drawing Book For Kids which shows kids how to draw 365 things complete with step-by-step directions.  My daughter loves to draw and right away she grabbed some paper and started to make Halloween cards by following the directions in the book to make pumpkins, ghosts, vampires, bats, etc..  

Making cards with Woo Jr Drawing book for kids

I also see how useful this book could be in my classroom.  My students love to make cards, and bookmarks when they are done their work and I have a bin of scrap paper just for all those fast-finishers.  The drawings included in this book cover a range of themes including Halloween, Christmas, Easter, animals, flowers, transportation and more, so it could easily be used all throughout the year.


Making Halloween cards with Woo! Jr drawing books

Now I promised a chance to win all 8 books in the series, so here goes!  Enter below for your chance to win all 8 drawing and Activity books which has a retail value of just over $55. The giveaway will run from September 15 - October 2nd, 2017 and then the winner will be drawn.  Good Luck!

a Rafflecopter giveaway


Learning about color mixing with an easy preschool pumpkin craft

Who doesn't like to make Jack O'lanterns and pumpkins at Halloween?  With this easy Halloween craft for preschool your students will learn about color mixing while making a fun pumpkin craft.

Create a fun jack o'lantern by mixing colored paint


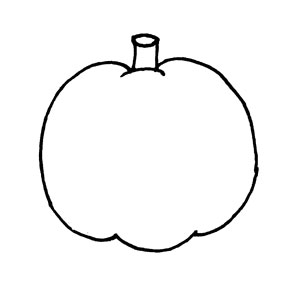
To make these Jack O'Lanterns I have the kids cut out the pumpkin shape first, they could draw it or you could give them a printed out version.  You can print out a blank pumpkin here.
blank pumpkin outline for printing
After the shape has been cut out I have them hold out their hands and I put one drop of red and one drop of yellow in each hand.  I then tell the kids to put their hands together and mix around the paint and to their amazement it turns orange!  Just like magic!  I then have them finger paint the pumpkin, spreading the color all over the pumpkin.  It's a great way to start a discussion about creating color and how the primary colors (red, yellow and blue) mix together to create the secondary colors (orange, green, purple).


Fingerpaint craft for kids jack o lantern


Next we cut out shapes from black paper for the face and Voila, a jack o' lantern is done!
fingerpainting with kids to make pumpkin craft


For more fun Halloween ideas check out the links below:  (click on the photos)

math activity for kindergarten counting pumpkin seeds         Halloween fine motor center using tweezers to move erasers


I may get commissions for purchases made through links in this post. For more information about this please see our disclosure policy

Framed art sculptures inspired by Louise Nevelson

Using famous artists as inspiration in teaching art to kids is a great way to inspire creativity.  Today I am going to share our latest art activity and how we created framed art sculptures inspired by Louise Nevelson.

Louise Nevelson collage art for kids using found objects


Every spring I do a lot of teaching around recycling and taking care of our environment.  The warm weather and blooming flowers set a perfect backdrop for talking about keeping our community clean, garbage free and how to Reduce, Reuse and Recycle.  As we learn about all the ways we can recycle we tend to collect a lot of "stuff" or "junk" that we try to re-use or re-purpose.   One of the ways we use our found objects is to create collages and art sculptures.

Louise Nevelson is one of my favorite sculptors to share with my students.  She was an artist most known for her monochromatic abstract expressionist sculptures.  Her most famous sculptures were created with materials such as wood, paper, aluminum and other pieces of found objects from the streets of New York and she would assemble the pieces in open-faced wooden boxes that were stacked and grouped to make free-standing walls and displays.  Her sculptures were painted in a single color, usually black, but sometimes white or gold.

To create our sculptures we need to have the following supplies:
  • a base (picture frame, or shoe box, shoe box lid, or piece of wood or cardboard)
  • found objects (anything from the recycling bin, including toilet rolls, nuts, bolts, clothespins, etc.)
  • glue (wood glue, Elmers glue, hot glue gun, cool glue gun)
  • spray paint 


To start my lessons I like to share photographs of Louise Nevelson's sculptures and have my students study each piece pointing out the different items in each box and try to figure out what each piece used to be.  We talk a lot about what shapes and lines we see (circle, oval, rectangle, curved, straight, etc..) as well as what the concept of abstract means, and also about how different pieces can be layered or placed on top of each other to create designs. 

Next I hand out the bases for our sculptures.  In the past I have used shoe boxes, shoe box lids and picture frames.  I love the look of shoe boxes because they remind me of Louise Nevelson's sculptures the most but I find picture frames work the best with my students because when we dismantle our display and send home our art work, parents tend to toss the shoe boxes but keep the art in the picture frame.

art activity for kids sculpture made from recycled objects

So once we have our base I have the students experiment with some of the found and collected materials and see what they can create by layering and using many different shapes.  We walk around and share our different creations.  I make sure to point out where I see layering, use of different shapes and lines, interesting use of space and use of empty space (this is hard for some).  I find this step is very important and is a must before I bring out the glue, otherwise I end up with a lot of flat pieces as they focus on filling up the space instead of layering and creating an interesting collection. 

art activity for kids arranging found objects in a frame

After sharing, the students go back and try to add to their sculptures, and then I bring out the glue.  So for most items white glue or wood glue works just fine but with heavier items they need to be hot glued in order to stay.  I usually set up a cool glue gun at each table group and the students share the glue as they need to.  With younger students you might want to have them design the sculpture first and then the teacher or older helper could do the hot glue step.

framed art sculptures hot glue found materials in a frame

Once the sculptures are glued and dried, we take them outside and spray paint them.   I like to use a cardboard box in case I get crazy with the spray paint.


art activity for kids create a framed sculpture and spray paint it black


Once they are dry, they can be displayed as a group or left to be individual art pieces.
Louise Nevelson inspired art frames


This post is part of the Exploring Famous Artists Blog series hosted by Messy Little Monster.
 
Exploring Famous Artists Blog series hosted by Messy Little Monster.

How to make a paper mache love bird for Valentine's day

Paper Mache we have all heard of it but are you brave enough to have your students or kids use it?  Paper mache is the process where you take a glue mixture made from water and flour or white glue and dip newspapers or paper towels in it and construct your sculpture.  Sounds very scary now doesn't it!  But it really is not.  It's actually very simple and works great for kids crafts.  The hardest part is deciding what you are going to make!


kids crafts-how to make paper mache love birds for valentine day

For this project we decided to make Valentine Love Birds.  Aren't they cute!  These were made by my own kiddos (5 years old).

Supplies needed:
  • newspaper or paper towel
  • cardboard
  • masking tape
  • flour (1 cup)
  • water (2 cups)
  • salt (1tsp)

To begin you need to deign your base or basic shape.  There are many ways you can do this.  Some people use balloons and some use newspaper or cardboard.  To make our love birds, I decided to use newspaper.  We scrunched the paper into balls and then taped two balls on top of each other.  We also added a beak, made by folding a cardboard rectangle in half and then we taped it on as well.

kids crafts paper mache love bird roll two balls of newspaper

Next you need to cut up strips of newspaper or paper towel and prepare your glue mixture.  There are many different paper mache recipes.  Some use white glue, some use rubbing alcohol, some use flour, some use salt, and the list goes on....  For our love birds I decided to use 1 cup of flour, 2 cups of water and a tsp of salt.

kids crafts paper mache reciepe for paste


What you are left with is a nice goopy, globby, drippy concoction.  This next step is defineately the fun part.  You take the newspaper strips (or paper towel) one at a time and dip them into the mixture and then simply wrap them around your base.  You keep doing this until you have about 3 layers and your entire base is covered.   Some kids will not like touching the mixture and won't add enough layers and others will get right into it and have a drippy, soggy, blob.  Just keep reminding them to add one layer at a time and to cover the whole area.  The great thing about paper mache is that it is forgiving when it is wet.  Simply pull off layers or add layers until you get your desired result.  Then you have to let it dry.  It will take at least overnight.

kids crafts paper mache love birds dip strips in paste

When it is dry, take a little sand paper and give it a quick sanding, just to take off all the left over flour globs and give it a smooth finish.
kids crafts paper mache love birds sand paste excess

Lastly you get to paint it!  Now you might want to give it a quick layer of white paint first as a primer coat before you get into the colored paint but that is up to you.


kids crafts paper mache love birds paint red heart


kids crafts paper mache love birds paint love birds

And voila!  After adding some feathers our love birds were done just it time for Valentine's Day! 

kids crafts paper mache love birds

This post is part of the Ultimate Guide to 50 Craft Materials Linky, Coordinated by Craftulate.  50 different bloggers each presented an ultimate guide to different crafting materials.  To see the list of all 50 Craft Materials and the corresponding blog posts and linky head on over to Craftulate.


ultimate guide to craft materias


If you have any posts that show off your paper mache ideas and projects please link them up below.


I may get commission from purchases made through links on this page. Please see my disclosure policy for more information.
I get commissions for purchases made through links in this post. For more information about this please see our disclosure policy

Browse other gifts from Zazzle.
Disney Descendants
Custom Fabric